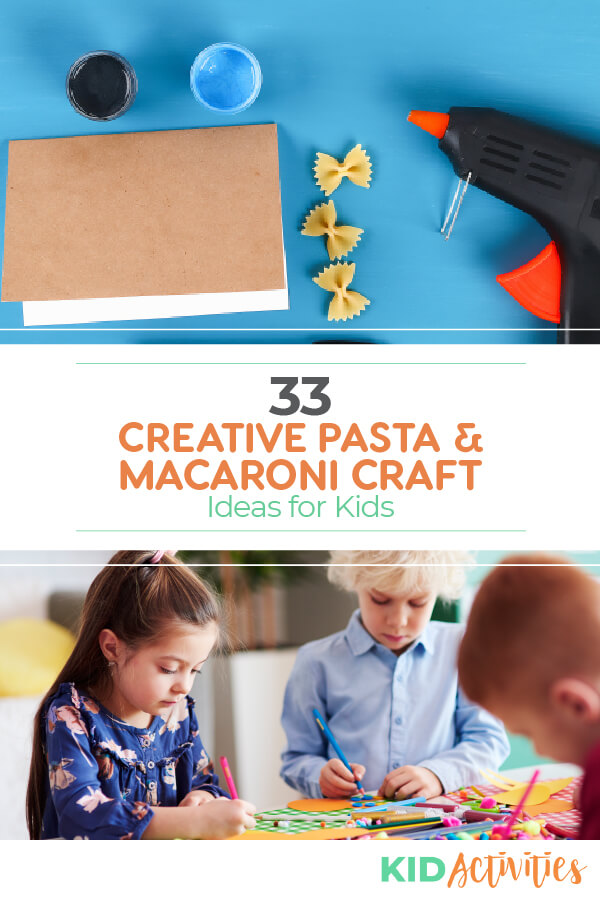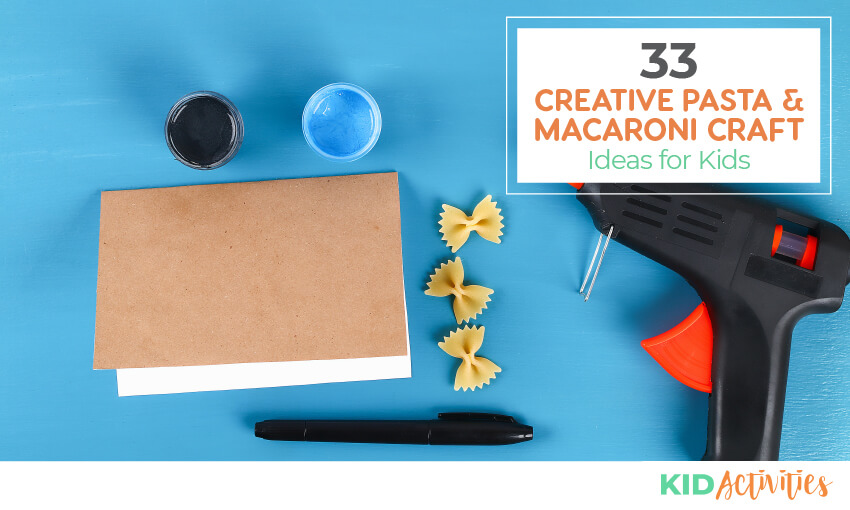
Who says pasta is boring? Let’s prove this wrong with these pasta craft ideas and macaroni art installations that will keep your students entertained.
It’s fairly inexpensive and it can be the perfect ingredient to inspire creativity.
Add color and texture to your next school art project with these fun and lively pasta craft ideas.
How to Dye Macaroni and Pasta Noodles
Dying noodles is easy to do and gives kids something bright and beautiful to work with. Once the pasta is colored and dried, it can be used for crafts, artwork, collages, necklaces and more!
Dyed Pasta Recipe 1
How to make:
- Pour approximately 1/2 cup rubbing alcohol into each bowl.
- Add 10 or so drops of food coloring into each bowl, one bowl for each color.
- Drop the pasta into the bowl and stir gently with a spoon for a few seconds.
- Remove the pasta from the bowl and allow it to dry for several hours on a paper plate or paper towel.
- The colors will brighten as the pasta dries.
Dyed Pasta Recipe 2 (Macaroni or Spaghetti Noodles)
Materials:
| ✓ 1/4 cup of rubbing alcohol | ✓ 1 tablespoon of food coloring of your choice |
| ✓ 2 cups of pasta of your choice | ✓ 1-quart zip lock freezer bag and large paper grocery bags, paper towel, or paper plates to dry the pasta after colored |
How to make:
- Pour alcohol and food coloring in a Ziplock freezer bag. Zip it and shake to mix, when mixed add the pasta.
- Make sure the bag is zipped; turn the bag over and over on the table to evenly coat the pasta.
- Leave pasta in the bag for about an hour.
- Turn it over after 30 minutes to evenly coat it.
- Pour it out onto the paper bags, towel or plates, dry overnight.
- Children can do this for you. Just put the alcohol into the bags ahead of time. Provide 1 cup measuring cups and measuring spoons. Let the children choose the color and the pasta to put in their bags. Make sure all bags or closed tight. An adult needs to pour the pasta out to dry.
Pasta Craft and Macaroni Arts Ideas
1. Cooked Pasta Art
How to make:
- Toss pasta (a handful for each child) into a pot of boiling water. Add a tablespoon of cooking oil to keep it from clumping together. Cook until the pasta is soft but not mushy. Drain and rinse with cold water so that it will be cool enough to handle.
- Shape the pasta into flowers and faces or stretch them into scenic landscapes. For varying lengths, kids can cut the spaghetti with a plastic knife before pressing it onto the page.
- To keep a favorite picture, cover it with waxed paper and top with a heavy book so that it will dry flat. The pasta will adhere even after it hardens.
Variations: If you’re out of spaghetti, try using other pasta shapes. (Cook them all in the same pot.) Make a ‘poodle’ out of elbow macaroni or a ‘fire truck’ from lasagna)
Tip: Add a bit of food coloring to the boiling water for bright-hued noodles.
2. Paint with Cooked Noodles
How to make:
- Cook spaghetti and add some oil to the water so that the noodles do not stick together.
- Drain and place in a small container for the kids.
- Set out 2-3 plates filled with different colors of tempera paint and some white paper.
- Show children how to drag a piece of spaghetti through the paint to create interesting designs on the paper.
3. Pasta and Pipe Cleaner Figures
How to make:
Take a pipe cleaner and arrange pasta on them to create people and animals. Do this by matching shapes and sizes and bending them to create almost anything.
4. Make a Macaroni Snake
How to make:
- Take a package of dry macaroni and thread each piece on to a piece of string that is long enough to be dragged on the floor behind you.
- Allow enough string at one end to loop it around your wrist and tie a knot to secure it.
- Tie a triple knot at the opposite end to ensure that the macaroni doesn’t fall off.
- If macaroni has not already been colored – paint the snakes in bright colors.
- Place your wrist through the loop.
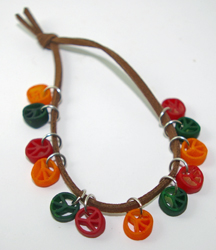
5. Pasta peace bracelet
Materials:
| ✓ Peace sign-shaped pasta | ✓ Food coloring |
| ✓ Leather or faux leather cording | ✓ Jump rings |
| ✓ Zip-close plastic bags |
How to make:
- Place peace pasta in separate plastic bags and add food coloring.
- Make 3 or 4 colors. Let pasta pieces dry on newspaper and then on foil (so it won’t stick).
- Once dry, carefully pry open jump rings and loop one around the top of each peace sign and reclose.
- String rings onto cording and tie cord to secure.
6. Soup Can Vase or Pencil Holder
How to make:
- Clean the can being careful of the edges! Sand the lip of the can with your sandpaper, to smooth sharp edges. Rinse any shavings off of the can.
- Fill a paper towel with a layer of noodles
- Coat the outside of the can with glue, using a paintbrush
TIP: Leave a half an inch or so on the top and bottom of the can without glue, so it won’t pick up pasta noodles and you can handle it more easily. - Roll the can in the noodles covering the can; make sure the noodles are stuck securely and let them dry.
- Spray paint the outside of the can any color you like (Many kids liked gold)
- Let them dry and use them to fill with flowers or pens and pencils, or whatever you like! They make great gifts.
7. Dried Apple and Cinnamon Pasta Hanging
How to make:
- Slice apples sideways and place the slices in a lemon juice and water mixture for a few minutes.
- Moisten rigatoni pasta with water and then roll and coat them in cinnamon.
- Using plastic needles and yarn, alternately string the apples and noodles.
- Add a country fabric bow (or your choice of bow) to the top and dry near a sunny window.
- The hangings need not be in a wreath shape, but hang straight down.
- They look and smell great.
8. String Macaroni for Celebrations
Strung macaroni can also be used as part of party decorations. You can use it much as you would paper chains or to use on your Christmas tree as garland.
9. Tissue Box Gifts
Materials: ✓ An un-opened facial tissue box
How to make:
- Take the box and glue pasta shapes all over it except the opening at the top.
- If kids want, give them a couple of days to cover the box completely with the pasta shapes (they’ll do a nicer job if they also have time to do other things too.) Use uncooked pasta shapes of macaroni, wagon wheels, bow ties, and cork-screws.
- When the glue has dried, spray paint the boxes gold (away from the kids)
10. Pasta Frames Unpainted
- Cut out cardboard frames for children or purchase pre-made cardboard frames from a craft supply company or store.
- Glue colored pasta shapes around the frames.
- Take pictures of the children and attach it to the back then give as a gift.
11. Painted Pasta Frames
Materials: ✓ Card Stock ✓ Pasta Shapes ✓ Spray Paint ✓ Strong Glue ✓ Tape ✓ Magnetic Strips ✓ Ruler ✓ Scissors ✓ Pencil
How to make:
- Take card stock and measure and cut the size of the frame you want.
- Next, cut out the middle to fit the size of the photo you want to frame.
- Glue pasta shapes onto the frame. When pasta is dry take the frame outside and spray with chosen spray paint. Leave frame to dry.
- Tape picture on the back of the frame and you have a one-of-a-kind photo frame.
- Turn your frame into a magnet by gluing a magnet on the back of the card stock.
12. Plastic Pasta Music-Shaker
How to make:
- Find a clean, empty plastic container with a screw-on lid, such as a peanut butter jar or an individual serving juice or milk bottle.
- Put a handful of uncooked macaroni in the container.
- Put some glue around the edge of the container and screw the lid on tightly.
- Allow the glue to dry before shaking.
- Decorate with stickers or colorful masking tape.
Variation:
1. Get two washed, empty yogurt containers.
2. Quarter-fill each with macaroni pieces and tape the containers together, rim to rim.
3. You now have a homemade percussion instrument –
13. Making Cards with Pasta Shapes
Materials: ✓ Paper ✓ Macaroni ✓ Glue ✓ Tempera paint
How to make:
- Fold the paper into a card shape.
- Glue macaroni onto the front of the card, either in a random fashion or as part of an overall picture or design. Allow the glue to dry.
- Use tempera paints to add color to the macaroni and to the rest of the card.
- Write a message on the inside of the card.
- Make sure the card is cushioned so it doesn’t get destroyed if the card is mailed.
14. Make a Pasta Collage
Put out a variety of colored pasta (rice would be nice too) What kind of textured creations will the children come up with?
15. Pasta Decorated Coin Holder
How to make:
- Have children mold pieces of dough into small bowl shapes (Baked Art Dough directions are below)
- Decorate the bowls by pressing colored pasta pieces and dried beans into the shape.
- Bake the bowls with decorations in place.
- Use the following recipe and baking directions
Making the Baked Art Dough
How to make:
- In a bowl, mix together 2 cups flour and ½ cup salt.
- Stir in ¾ cup water.
- Knead the mixture for 8 to 10 minutes, until it is smooth and pliable.
- If the dough is too dry, add a few drops of water.
- If it is too sticky, add a small amount of flour.
- Have children mold the dough into shapes and press in the pasta and bean decorations when desired.
- Place the decorated shapes on a baking sheet and bake them at 300 degrees F for about 4 hours, or until hard. If desired, when shapes are cool and dry, spray the painted or unpainted shapes with a clear fixative – in an area away from youth.
16. How to Make a Macaroni Skeleton
Materials:
| ✓ Black construction paper (approximately 6″ x 11.5″) | ✓ Glue that will dry clear |
| ✓ Lima beans (head, thorax, hips) | ✓ Short, small macaroni in a tube (spine) |
| ✓ Thin twisted macaroni (arms, legs) | ✓ Elbow noodles (ribs) |
| ✓ Small shells (joints) | ✓ Spaghetti (fingers, toes) |
| ✓ Black permanent marker |
How to make:
- Build a sample skeleton for the children to copy from. Review the key features with them.
- Guide children to build their skeleton working from the head down (i.e., head, neck/trunk, ribs, etc.), gluing the macaroni and beans to the paper as they go.
- When the glue and macaroni have set, have them draw a smile and eyes on the “head”.
TIPS: As preparation for this project, study the human skeleton. Talk about symmetry between the two sides of the body, and how many ribs, fingers, and toes we have. (Also good at Halloween )
17. Layered Pasta Jars
Collect an assortment of jars. Have children fill the jars in layers with a variety of shapes and colors of pasta. The jars make pretty decorations for kitchens, etc. Nice to give as a gift.
18. Colored Pasta Rainbows
How to make:
- Dye pasta that can be strung in batches of red, orange, yellow, green, blue, and purple.
- Have children use the pieces for making a rainbow.
- Either GLUE ON white paper to make a rainbow or.
- STRING ON very long yarn in batches of colors.
19. Spaghetti and Seed Plaque
How to make:
- Glue dry spaghetti onto a plaque-shaped piece of barn wood (any wood)
- Fill each section with different pasta/seeds/beans. Arrange pasta and seeds into different patterns, by colors or by shapes.
- You can attach a “picture hook” to the back to hang in the kitchen or prop against something.
20. Maple Leaf Pasta Magnet or PIn
Materials:
| ✓ Uncooked spaghetti | ✓ Adhesive-backed magnet |
| ✓ Green food coloring | ✓ Cardboard |
| ✓ Recycled clean margarine container | ✓ Styrofoam vegetable trays |
| ✓ Spoon | ✓ Paintbrush |
| ✓ Scissors |
How to make:
- Draw and cut out a maple-leaf shape on a piece of cardboard. (Good idea to make a template for the kids to trace)
- Pour 1/4 cup (50ml) white glue into an empty margarine container. Add 2-3 drops of green food coloring to the glue. Mix well, until the color is a shade you like.
- For a good work surface – Place cardboard leaf into a styrofoam vegetable tray. Paint the entire surface of the leaf with the colored glue.
- Break spaghetti sticks in half. Line up the spaghetti sticks in a single direction on the leaf. Be sure the spaghetti is adhering to the glue. Leave the spaghetti untrimmed at this point.
- Cover the untrimmed spaghetti with glue-coloring so that it is completely colored.
- Let the leaf dry on a clean styrofoam tray. Once the glue has dried, carefully cut around the edges of the cardboard shape to remove the excess spaghetti. It is helpful to turn the leaf ‘spaghetti-side down’ while cutting the spaghetti.
- Repair jagged edges with glue and pieces of trimmed spaghetti. Allow drying a second time.
- Adhere two magnets to the center of the cardboard back. This project also makes a great lapel pin. Just use a pin backing instead of a sticky-backed magnet! Adapted from TeaPartyCrafts
21. Macaroni Ornaments
Material: ✓ (1) 3″ X 4″ piece of tagboard or lightweight cardboard for each ornament. ✓ Paper clip for each ✓ All shapes and sized of macaroni ✓ Scissors and glue ✓ Gold spray paint and newspapers.
How to make:
- Fold the 3″ X 4″ piece of tagboard or cardboard in half.
- Cut out ANY shape desired for the ornament.
- Cover the cutout shape with glue.
- Arrange the dried pasta shapes on the ornaments. They can be arranged any way the children like.
- When one side is complete- let it dry and set.
- Turn it over and do the other side.
- Put a clip through the cardboard to hang. Spray with gold spray paint. It is advisable to lay many ornaments on newspaper and spray all at the same time. Let one side dry and then do the other side.
22. Pasta Necklaces
How to make:
- Rigatoni pasta works great for this activity. Set out some colored pasta.
- Give children a 12 – 14-inch length of yarn.
- Wrap tape around one end of the yarn for a needle and tape the other end of the yarn onto the table (to keep the pasta from falling off).
- Have children thread the yarn through the pasta pieces.
- Help children finish their necklace by tying the yarn ends together.
23. Alphabet Noodle Bracelet
Materials: ✓ Lightweight cardboard such as from cereal boxes ✓ Uncooked Alphabet shaped noodles ✓ Hole puncher ✓ Glue ✓ Yarn
Directions:
- Cut out a piece of cardboard that is about ½ inch wide and long enough to fit around the child’s wrist.
- Spell out child’s name -or any other word – with the alphabet noodles
- Be sure to place your word in the center of the cardboard strip and glue them in place
- Allow the glue to dry; when the glue is dry punch, a hole at each end of the cardboard.
- Cut a piece of yarn that is about six inches long and string each end up through each hole on the bracelet and tie the bracelet to fit the wrist.
Tip: You can leave as is…or before you tie the bracelet – paint it using acrylic paints or spray paints. Make sure to apply thin coats of either paint and allow the paint to dry. If using acrylic paint make sure to use a sealer as well. Another choice is to dye the pasta; directions are below.
24. Pasta pictures (For all ages)
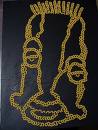
Make pasta pictures with any dry shaped noodle you can find. The more texture to the noodle, the better.
This makes a great craft project.
You will need heavy card stock or construction paper, (the sample is on masonite) a variety of texture and different shape pasta noodles and Elmer’s glue.
Allow the kids to be creative and design their own picture or you can give them a theme to follow such as make a pasta head. Be sure to let the glue dry overnight or at least for a few hours.
25. Pasta Art and Letter Ideas
You can also use pasta shapes to decorate drawings, write messages, or make word art.
26. Pasta People
Materials:
✓ Different types of pasta and dried beans, such as spaghetti, macaroni, tiny tube pasta, long tube pasta, wagon wheels, long spirals, tiny shells, wagon wheels ✓ A piece of construction paper ✓ White glue
Directions:
- Glue the pasta to the paper using white glue.
- Have the kids arrange the pasta on the paper before gluing (to make sure that they have room for the whole body on the piece of paper).
- You can use just about any type of pasta (or dried beans) for the body parts. Experiment with different variations
27. Make a Party Lei
Great for a party, celebration or just for something pretty! They aren’t only for a Hawaiian Theme! Layout pre-cut pieces of string, twine, raffia, or fishing line, long tube pasta and plastic or fabric tropical flowers. The kids can string together the flowers and pasta to make fun to wear a lei necklace.
28. Dried Apple and Cinnamon Pasta Hanging
Directions:
- Slice apples sideways and place the slices in a lemon juice and water mixture for a few minutes.
- Moisten rigatoni pasta with water and then roll and coat them in cinnamon.
- Using plastic needles and yarn, alternately string the apples and noodles.
- Add a country fabric bow (or your choice of a bow) to the top and dry near a sunny window.
- The hangings need not be in a wreath shape – but hang straight down. They look and smell great!
29. String Macaroni Party Decorations
Strung macaroni can also be used as part of party decorations. You can use it much as you would paper chains or to use on your Christmas tree as garland.
30. Seashell Pasta Necklaces
Directions:
- Cook jumbo pasta shells in boiling water for 3 to 4 minutes. Plan to cook about six shells for each necklace that you want to make.
- Drain and cool the shells.
- While the shells are still soft, poke a hole into each end of each shell with a needle. Allow shells to dry.
31. Pasta Stamped Paper
Materials: ✓ Plain white paper ✓ Paint/paintbrush/markers/crayons ✓ Pasta shells of different designs ✓ Glitter, sequins
Directions:
Dip pieces of pasta in the paint to make pasta shaped impressions on the paper. Use markers, crayons, paints, and glitter or sequins to fill in the background
32. Pasta Snowflakes
Materials: ✓ Wheel shaped pasta ✓ White paint ✓ White glitter ✓ Dry Tapioca pudding mix ✓ Paint brushes ✓ Elmer’s glue
Directions:
- Take round wheel-shaped pasta and glue them together in a circle shape.
- When dry paint the entire snowflake white. Before the paint dries sprinkle on glitter mixed with dry Tapioca pudding mix.
- To hang from the ceiling, insert a piece of string or yarn through one of the wheel holes after the snowflake is dry.
33. Valentine Spaghetti Art
Directions:
- Cook spaghetti noodles, drain and cool.
- Fill a gallon Ziplock bag one-quarter of the way with water.
- Add red food coloring to the water.
- Add cooked spaghetti and mix around in the Ziplock bag until noodles change color. Drain.
- Children can take one noodle at a time, dip it in glue and place it on a piece of paper in the shape of a heart. Submitted by Cassie/Michigan Check out more fun Valentine’s Day craft ideas.
Conclusion
We hope these pasta art and macaroni craft ideas have inspired you for your next classroom project. They are a great way to get kids making unique designs with an element of 3D.
We have more art ideas for elementary age kids as well as some fun craft ideas.