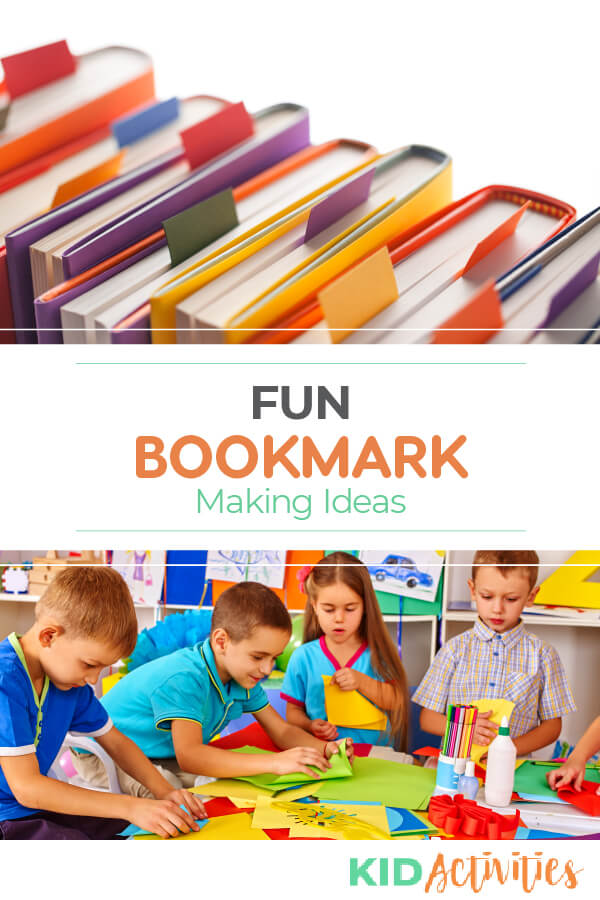
Use these 14 bookmark making ideas and designs to teach students how to make bookmarks of their own.
Make bookmarks as gifts, for bookmark making competitions, or for simply keeping your place when reading a good book.
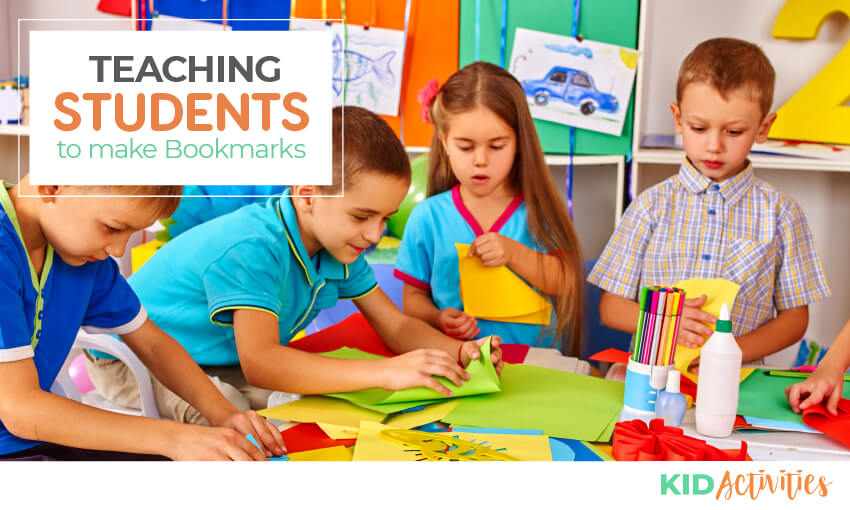
These ideas are a great way to get your children’s creative juices flowing. Help facilitate the project but let them surprise you with how good of a job they end up doing.
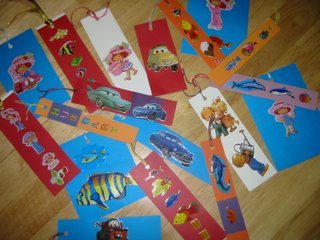
1. Construction Paper Bookmark
Put out a variety of construction paper, markers, paints, and stickers. You can also use glitter, sequins, lace, doilies, buttons, and any other odds and ends you have leftover from other projects. Individual-creative bookmarks!
Cut the front of appropriate greeting cards into 2 inch wide strips. Punch a hole at the top of each strip and attach a yarn tassel. Children can decorate the backs of the strips with markers and crayons if desired.
2. Bookmark Idea
Tip: Cut strips from construction paper; painting the construction paper will make it sturdier or you can visit the local library or office supply to have them laminated for longer-lasting use. To complete the bookmark, attach a tassel made from strands of yarn.
3. Book Worm Bookmark Idea

Directions:
- Draw a worm on card-stock paper – large and wide-enough to mark a page well. (You can have children make their own bookworm or you can make a template for them to trace)
- Cut out the worms. With a craft punch, make a hole at the top.
- Now personalize the worms! Make swirls, dots, and lines in different colors.
- Add a silly face, some words, or the name of a favorite book.
- Flip the bookmark over and decorate the other side a whole new way!
- Embellish the bookmark with ribbon, string, or yarn tied into the hole at the top. Add self-adhesive google eyes or other decorations, too.
- If you can, laminate them to use repeatedly. (Source Crayola.com)
Bookmark slogan ideas:
• Time for reading
• Reading is the next best thing to
• Switch on to reading
• I’m a bookworm
• Sssh! I’m reading
• Dive into a book
• Enter a different world – read!
• Enjoy a book- get reading!
• I’ve got my head in a book
• Have you chosen a good book?
• R is for reading
• 54321 read!
• Ready, steady, read!
• Reading is fun!
• I ♥ reading!
• Reading is cool!
• Reading forever!
• I ♥ 2 read!
• Make friends with a book!
• What’s inside your book?
• Born to read
• I’m off to see the world – read!
• I’m ready for reading!
• On your mark, get set, read!
4. Button bookmarks
These are fun and easy for kids to create.
Simply cut lengths of ribbon (these are 12 to 14 inches long, to fit a standard-size hardcover book), then attach buttons to the ends using tacky glue or a glue gun.
Shown here are just a few of the decorating options: sandwiching the ribbon’s ends between two buttons; stacking smaller atop larger buttons; and grouping several small buttons in a pattern.
5. Diy corner bookmarks
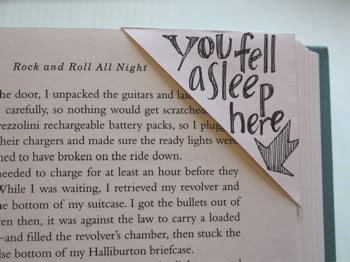
I love this idea! My husband has been doing a lot of reading–so when I saw this idea–I quickly pulled out a couple of envelopes (one bright orange business-size and one smaller greeting card).
I did my thing with cutting (without measuring) and embellished a bit. Both corner bookmarks came out great! Try this fun and easy idea with your kids or yourself.
Directions:
- Select envelopes to use. The corners of the envelopes should be in good condition as you’ll cut the corner off the envelope and use the corner to create your bookmark.
- If you want more precision than what I did-
Measure 2-inches down the sides of the corner of the envelope. Make a small pencil mark at each location. - Draw a straight line from one side of the corner to the other side of the corner, at the pencil marks. You have created a triangle shape at the corner of your envelope. Cut the triangle-shaped corner off of the envelope. (You can also use scissors with decorative edges)
- Slip the cut corner on the page of a book. This will give you an idea of how it fits.
- You can now decorate as desired using lace, gift wrap, ribbon, hand-made drawings and paint, small images, stickers, rubber-stamps, or calligraphy. If you embellish, glue decorations on the bookmark and let dry.
- Experiment with different kinds of envelopes. Colored, onion-skin and handmade envelopes all create interesting corner bookmarks.
These would also make a great seasonal craft or gift. Add ghosts or pumpkins for Halloween, a turkey for Thanksgiving or a heart for Valentine’s Day.
6. Frugal bookmark idea
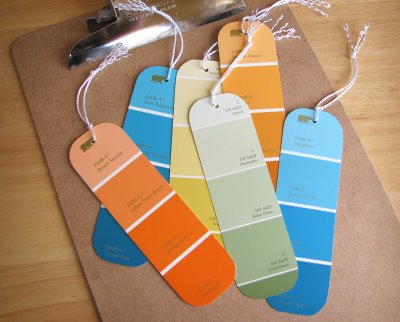
You know the OLD PAINT CHIP CARDS you used when you were trying to decide what color to paint? They can be turned into great bookmarks (gift tags too).
Put a hole in them with a hole puncher, string ribbon through them! You now have great bookmarks.
Tip: Add paint cards to your “Parent Wish List”!
7. Recycled package bookmark
Directions:
- Simply pull out your colorful cardboard packages, flatten them out and cut them into strips about 1 1/2″ x 6″. A paper cutter will give you a more consistent cut. And any size strip will do–as long as it fits in your book.
- Trim corners with a corner rounding tool, scissors or an X-acto.
- Punch a hole in the top and thread it with a matching ribbon
8. ‘Sticker’ bookmark
Materials:
✓ Colored cardstock or used/discarded manila folders
✓ Scissors
✓ Ribbon, thread or yarn
✓ Hole punch
✓ Stickers
Directions:
- Cut out the paper into various shapes and sizes
- Punch a hole at the top and thread a ribbon or colored yarn through the hole. Tie into place
- Decorate with stickers.
9. Diy fabric bookmark
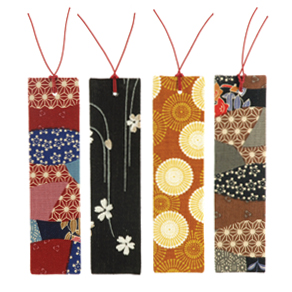
Directions:
- Brush rubber cement onto a piece of card stock in an area larger than the size your finished bookmark will be. Stick on a scrap of fabric, smoothing out any wrinkles.
- Flip the cardstock over and repeat for the backside of the bookmark.
- Mark the edges of the bookmark with a ruler and pencil, then cut it out using sharp scissors.
- Punch a hole at the top and tie on a thin ribbon, thread, or yarn.
10. Fall themed bookmark
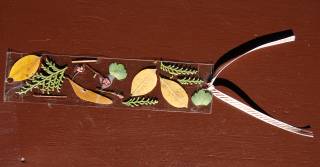
Wrap a piece of masking tape (sticky side out) around each child’s wrist. Go on a nature walk and have children collect a leaf from each of several trees sticking it on their leaf bracelet.
Get a Book with a variety of leaves to compare ‘finds’ when you return. Children will also be able to go home and see what leaves they find there.
As shown, take clear packing tape and make wonderful bookmarks with a variety of nature finds! Photograph courtesy of Angela at Colorfool. Angela shares that flat items adhere better than bulky.
11. Community service bookmark idea
Make and laminate bookmarks for your school or hometown library.
With your class or program, make some pretty bookmarks; leave them in a basket on the library counter for other children and adults to take one when they check out books.
12. Fun diy foam bookmark
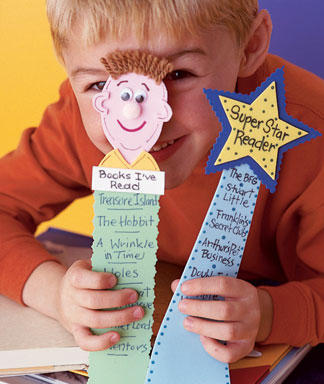
Materials:
✓ Fun Foam in assorted colors
✓ Decorative scissors (optional)
✓ White glue
✓ Fine-point permanent markers in assorted colors
✓ 3/4″ pompom
✓ Two 5 mm movable eyes
✓ Yarn
- Directions:
Cut 2″ x 10″ strips of Fun Foam for the base of the bookmark. Cut additional shapes, such as face or star. Use decorative scissors if desired. - Glue shapes to one end of the strip. Decorate shapes with markers, movable eyes, pompom nose, yarn, and hair.
Extension: Write names of books you’ve read on base strip. Source: Women’s Day-July 8, 2008; Image by Paula Hible
13. Kindness bookmark
Purchase, download or make bookmarks
When you “catch a child” in an act of kindness, give them one of the bookmarks! Children receiving the bookmark feel good and the other children will want to know how to get one. It presents an opportunity to discuss altruism and acts of kindness with your group. Special bookmarks may be downloaded on the Random Acts of Kindness web-site.
Random Acts of Kindness Foundation.
The Random Acts of Kindness Foundation inspires people to practice kindness and to “pass it on” to others. They provide free educational and community ideas, guidance, and other resources to kindness participants through the website.
Also, Check out the Month of October It hosts Kids Care Week, World Food Day, Diversity Awareness Month, Make a Difference Day, Bullying Prevention Month, and Peace, Friendship and Goodwill Week. Whew. Lots of days to celebrate kindness and service!
14. Large paper clip bookmark
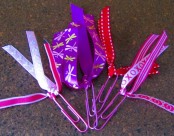
Simply take a large paper clip and tie a group of three or four ribbon lengths to the top of the clip. (The amount depends on the width of the ribbon.) The clips are great to mark book pages as well as clip envelopes and folders.
There you have it, how to make bookmarks for students. We hope you have found some creative bookmark making ideas and designs.